Table Of Contents
Trying to use your Outlook SMTP settings for better email deliverability?
Setting up Outlook SMTP settings is essential for ensuring your emails reach their destination without a hitch. It can seal or break the deal in your cold email campaign’s success with its offering to maintain effective communication.
This guide provides a comprehensive walkthrough of the process of configuring your Outlook SMTP settings with all the necessary information.
What is Outlook SMTP Settings?
Outlook SMTP, or Simple Mail Transfer Protocol, is the standard technology for sending email messages between servers. Its settings ensure that your Outlook account can send your emails through the mail server securely and efficiently.
Why Should You Use Outlook SMTP?
You should consider using the Microsoft Outlook SMTP Server for:
-
Personalized Transactional Email Capabilities: Outlook SMTP enables higher engagement rates as the emails are tailored to address the recipient’s specific needs and interests.
-
Multi-Client Email Dispatch with an Outlook Identity: Using Outlook SMTP allows you to send emails that maintain an Outlook identity across various email clients.
-
Custom Application Integration for Outgoing Emails: Its compatibility with various applications enables seamless integration when sending emails from custom applications.
-
Seamless Microsoft Ecosystem Synchronization: For businesses that rely heavily on Microsoft tools, Outlook SMTP ensures that email campaigns are well-integrated within the Microsoft ecosystem for better data management and analytics.
-
Enhanced Security: Outlook SMTP provides robust encryption, which secures email communications and protects sensitive information from unauthorized access.
Will You Need IMAP and POP Settings?
While SMTP is essential for sending out your cold marketing emails with the outgoing mail server, IMAP (Internet Message Access Protocol) and POP (Post Office Protocol) are pivotal for receiving and managing responses with your incoming mail server.
In cold email marketing, it’s not just about sending emails; managing responses effectively is also critical. This is where IMAP and POP come into play.
IMAP allows you to access your email messages from multiple devices, syncing in real-time. You can manage your email campaigns and responses seamlessly, whether you’re on your laptop at work or checking messages on your smartphone.
IMAP and POP – When to Use Which?
If you prioritize accessing their emails from various devices, IMAP is the preferable choice. It syncs your messages across multiple platforms by ensuring you can respond to leads or queries at the office or on the move. However, it requires a reliable internet connection to function smoothly.
On the other hand, POP is ideal if your priority is to maintain copies of your emails locally. This might be particularly relevant if you handle sensitive information and prefer the added security of not storing messages on a server. POP downloads emails to a single device and typically deletes them from the server afterwards.
How to Configure Outlook SMTP Server Settings?
Let’s get to the main point – a step-by-step walkthrough for setting up your Outlook SMTP settings.
1. Turn on Your 2-Step Verification
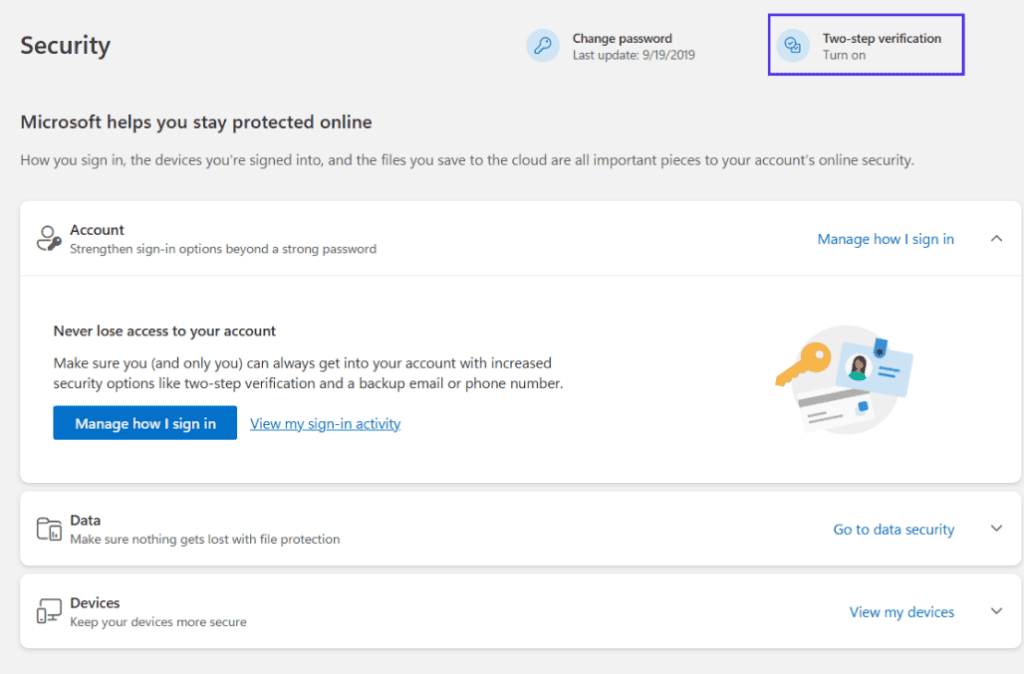
The process to activate the 2-step Verification feature starts at the Microsoft Security Page. You now have to navigate directly to the ‘Two-step verification’ option in the upper right section of the page.
2-step Verification Button in Outlook
Here, you’ll find the option to ‘Turn on’ this feature under the ‘Additional security’ section. You can complete your verification through multiple channels: an authentication app, an alternate email address, or a phone number.

Turn on 2-step verification under Additional Security Section
2. Generate An App Password
After enabling two-step verification for your Outlook account, the next step in configuring SMTP server settings for cold email marketing is generating an App password.
To create an App password, you will have to visit the Microsoft Security Page and log in. Once there, navigate to the ‘App passwords’ section and click on ‘Create a new app password.’

App Password in Outlook
It’s important to carefully store the generated password because once you navigate away from the page or close it, you cannot retrieve it again. While the system allows creating multiple App passwords, managing them can become cumbersome, especially if you frequently change them for security purposes.
3. Put All The Required Outlook SMTP Server Settings
You should input all the following settings credentials –
-
SMTP settings server address/ SMTP server name: smtp-mail.outlook.com
-
SMTP port: 587
-
SMTP encryption: STARTTLS
-
Username: Your full Outlook email address (e.g., [email protected] or [email protected])
-
SMTP Password: The App password you generated in the previous step
How to Configure Outlook IMAP Settings?
IMAP synchronizes email activity across all devices by maintaining emails on the server. This means you can manage your inbox and view emails consistently from wherever you are.
1. Put All The Required POP Information
To set up IMAP in Outlook, you need to adjust your account settings to enable IMAP access.
IMAP settings for Outlook
You will need to put the following IMAP setting information there then –
-
IMAP server name: outlook.office365.com
-
IMAP port: 993
-
Encryption method: TLS
-
Username: Your full Outlook email address (e.g., [email protected])
-
Password: The App password you generated in the previous step
How to Configure Outlook POP Settings?
POP3, or Post Office Protocol 3, facilitates the download of emails from your Outlook account directly to your computer. It is a crucial step, particularly for those who need to manage their emails offline, when you’re setting up Outlook SMTP settings.
1. Turn on POP Access in Outlook Settings
To activate POP access, you need to go to the settings menu by clicking the gear icon located in the upper-right corner of the page.

Settings Menu in Outlook
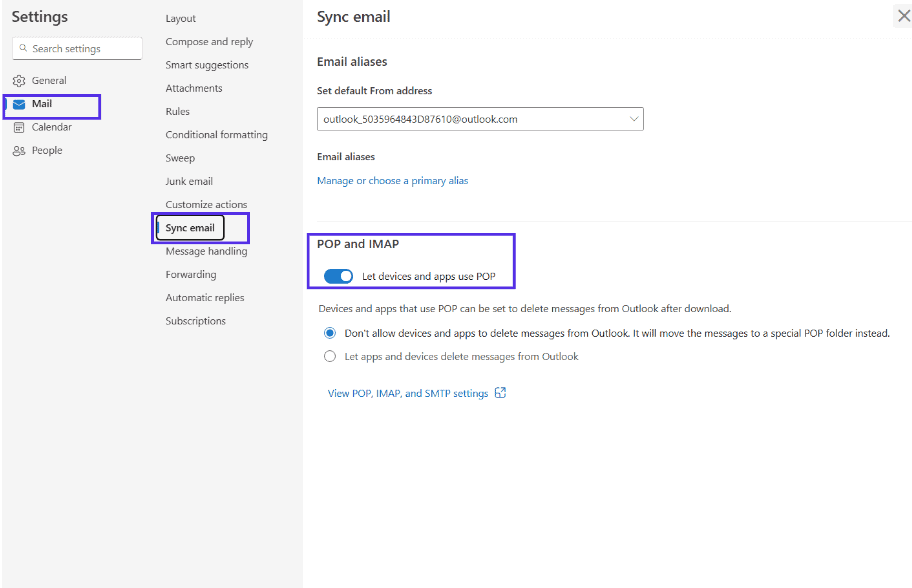
You should then select ‘Sync email’ within the ‘Mail’ section in the settings menu. Here, you’ll find the option to ‘Let devices and apps use POP.’ By ticking this option, you enable your Outlook account to communicate with email clients using POP.
POP settings for Outlook
2. Put All The Required POP Information
Type in the following credentials for POP settings –
-
POP server: outlook.office365.com
-
POP port: 995
-
Encryption method: TLS
-
Username: Your full Outlook email address (e.g., [email protected])
-
Password: The App password you generated in the previous step
Understanding The Issues You Might Face with Outlook SMTP
Going through some of the prevalent issues that appear while setting up the Outlook SMPT server settings can help you prepare to tackle them in advance.
Error 5.5.0 smtp;553: Domain Not Allowed
When you encounter the error “5.5.0 smtp;553 sorry, that domain isn’t in my list of allowed rcpthosts (#5.7.1)”, your recipient’s mail server is rejecting incoming emails from your domain. The problem often arises from server configurations that view your emails as untrusted.
Error 553 5.7.1: Sender Address Rejected
Receiving the “553 5.7.1 Sender address rejected: not owned by user” message suggests a misconfiguration in your SMTP settings. It typically occurs when the sender address does not match any account on the outgoing server, a common issue that can cause significant disruptions in sending cold emails.
Error 0x80042109: Cannot Connect to SMTP Server
The error “Task – Sending reported error (0x80042109): Outlook cannot connect to your outgoing (SMTP) e-mail server” can be a major setback. It usually suggests incorrect server details or connectivity issues possibly caused by firewall or antivirus settings.
Error 0x80040119, or “Unknown Error” (814441)
Encountering an “Unknown error” (0x80040119 or 814441) in Outlook can be stressful. This error affects not only sending emails but also reading, receiving, and deleting them. It suggests deeper issues, possibly related to third-party applications or corrupt Outlook data files.
How to Connect SalesMix with Outlook?
Integrating Outlook with your SalesMix platform can streamline your email campaigns and enhance your overall sales strategy. Here’s a step-by-step guide on how you can do that –
-
You will have to start by logging into your SalesMix account and then navigate to the “Email Account” tab.
-
Within the “Email Account” tab, you’ll find the “Add Email” button. Click on this to initiate the process of adding a new email account to your SalesMix setup.

Add Email in SalesMix
-
When prompted to choose the type of email account you want to add, select the “Other” option.
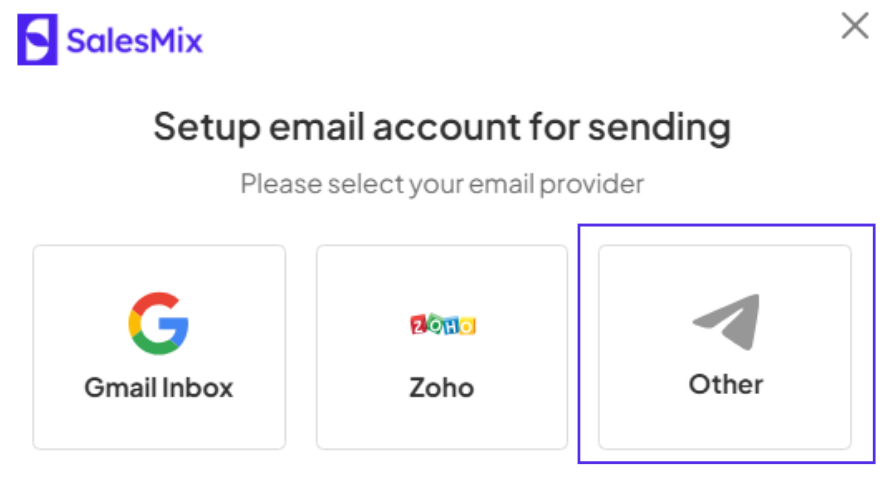
Select “Other” in the Email Account Option
-
Here, you will need to input the specific SMTP settings credentials for your Outlook account. These include your email, app password, name, outgoing server, outgoing port, and encryption type. Make sure to press the continue after inputting the credentials.
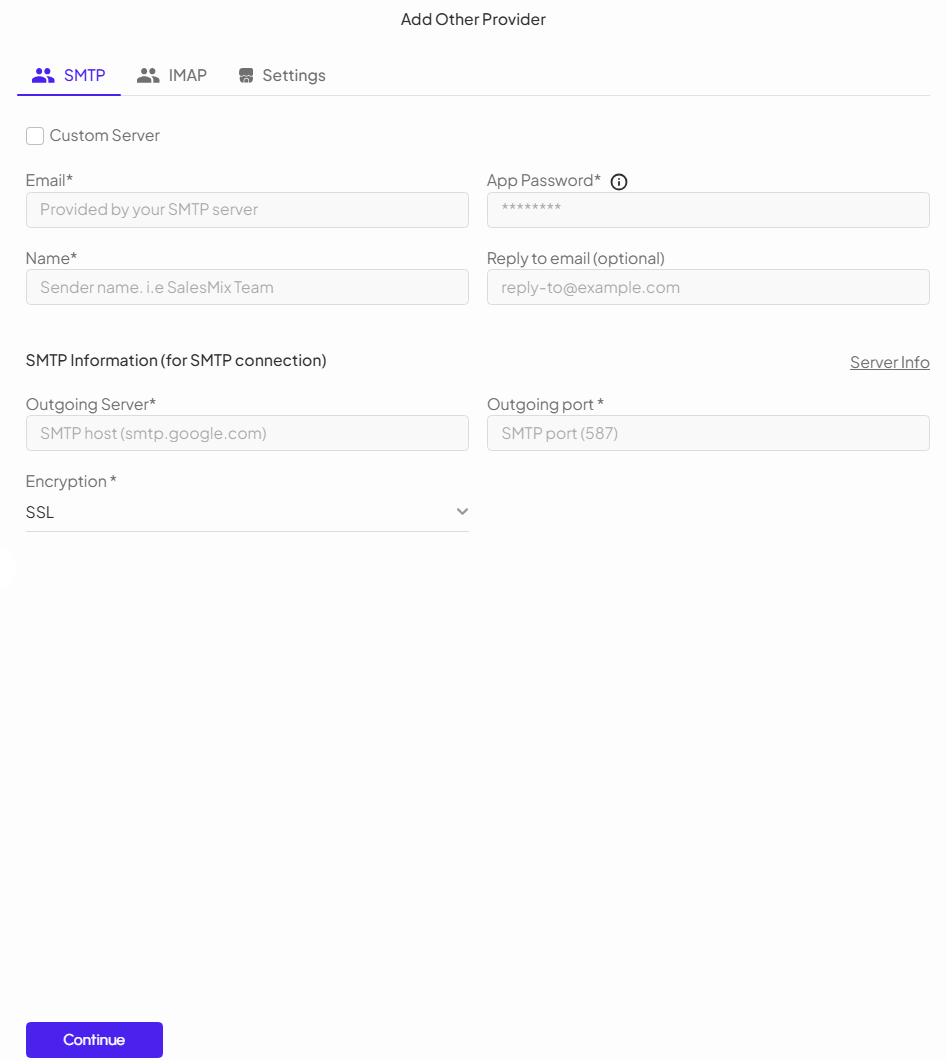
SMTP Credentials for SalesMix
Conclusion
Configuring Outlook SMTP settings and the setup can be pretty straightforward. However, you should still be careful during the setup, as even a simple mistake can hamper your cold email campaign.
Looking forward, the key to seamless email operations lies not just in the initial setup but in continuous monitoring and adjusting of your configurations to align with what’s required. You should stay informed about common issues and understand how to address them to ensure consistent cold email communication from your Outlook accounts.